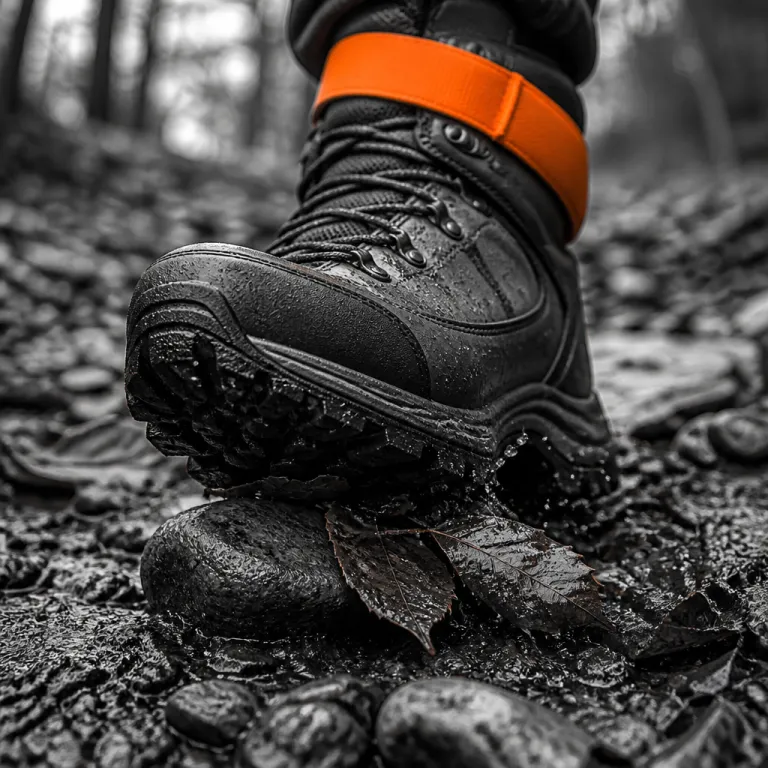
Why autumn footing punishes weak ankles
Wet leaves over rock turn every casual step into a test of ankle strength. Under that leaf litter, your foot can drop into a hidden hole while your body keeps moving forward, which is exactly how ankle sprains happen on mellow hiking trails that look harmless. When your lower leg and calf cannot react fast enough, the joint collapses into a twisted position and you feel that sharp ankle pain that ruins the day.
Fall trails add stacked hazards for the ankle and knee because slick roots, morning frost and loose gravel all reduce friction at the balls of the feet. Your boots might have aggressive lugs, but if your single leg balance is poor and your ankle mobility is limited, the best outsole still cannot save you when the ground slides sideways. That is why ankle strengthening for hiking must focus on the whole leg and foot system, not just one isolated exercise done on the living room floor.
Think about a typical descent on a forested side hill where the trail is narrow and the slope pulls your body downhill. Each step asks your ankle to hold position while your toes search for grip on roots and rocks, and your calf and lower leg must absorb impact without letting the knee cave inward. Strong, well trained ankles turn that chaos into controlled movement, while weak ankles turn it into a constant fight against injury and pain.
Most hikers blame their boots when they slip on wet leaves, yet the real failure often lives higher up the chain in neglected strengthening exercises. If your feet and legs cannot maintain leg balance when the surface tilts or slides, no amount of waterproof leather will keep you upright. Treat your ankle as a dynamic stabilizer that needs regular exercise, not as a passive hinge that your footwear alone can protect.
For outdoor enthusiasts who hike once a week, a simple three day routine of targeted ankle strengthening for hiking can dramatically improve stability before the season turns slick. The goal is not gym hero numbers but reliable ankle stability when your heels hit a patch of mud or your toes land on a rolling stone. Think of it as physical therapy you give yourself in advance, instead of rehab you are forced into after an avoidable injury.
Single leg balance and proprioception: your real anti roll system
Most fall trail injuries start with a tiny wobble that your body fails to correct in time. Proprioception, the nervous system’s sense of joint position, is what lets your ankle and foot react before your brain fully notices the slip, and it is trainable with simple single leg exercises. When you stand on one foot on an uneven floor and fight to hold position, you are teaching every small muscle in the lower leg to fire faster and smarter.
Start with a basic single leg stance near a wall or counter, with your feet hip width apart before you lift one foot. The starting position should feel stable through the balls of the feet and the heels on the floor, then you gently bend the knee of the standing leg and keep the other leg relaxed at your side. Aim to hold this position for 20 to 30 seconds, then switch feet and repeat, building up to three rounds per side as your ankle strength and balance improve.
Once that feels easy, progress to closing your eyes while maintaining the same starting position, which removes visual cues and forces your body to rely on pure proprioception. You will feel the ankle and calf working hard to keep the foot under your center of mass, and any old ankle sprains will quickly reveal themselves as the weaker side. This is where many physical therapists begin with patients who report chronic ankle pain after hiking, because it exposes hidden deficits that normal walking never challenges.
To connect this balance work with real trail demands, add controlled step downs from a low step or sturdy box. Stand with both feet width apart on the edge, then slowly lower one foot toward the floor as if stepping off a rock, keeping the knee aligned over the toes and the heel of the standing leg in contact with the surface. This eccentric exercise trains the quadriceps and calf to manage downhill loads, and it pairs perfectly with focused quad work such as the downhill strength plan outlined in this guide to stopping knee pain on descents.
As your control improves, you can integrate gentle side to side reaches while holding a single leg stance, tapping the free foot forward, to the side and behind you. Each reach shifts your body weight and forces the ankle to stabilize in a new position, which mimics the constant micro adjustments of real hiking over roots and rocks. Done three times per week, these strengthening exercises build a resilient leg balance system that quietly prevents the majority of ankle sprains before they happen.
Low equipment ankle strengthening for hiking: a three day weekly plan
You do not need a gym membership to build serious ankle stability for hiking season. A small resistance band, a stair, some floor space and your own body weight are enough to create a focused routine that protects your ankle, knee and foot on slick autumn trails. The key is consistency, not complexity, and a three day weekly structure fits easily before or after a short neighborhood walk.
Day one centers on calf raises and banded ankle work that target the lower leg muscles directly. Stand on a step with the balls of the feet on the edge and the heels hanging free, feet hip width apart, then slowly rise up onto your toes and lower until your heels drop just below the step, keeping the knee slightly soft. Perform three sets of 12 to 15 calf raises, resting briefly between sets, and focus on smooth movement rather than speed to improve both ankle strength and mobility.
After the calf work, sit on the floor with your legs extended and loop a resistance band around the forefoot of one foot. From a neutral starting position, pull the band to the side to create tension, then move the ankle through controlled ranges of motion, pointing the toes away, pulling them back and rotating gently inward and outward. These mobility exercises build ankle mobility while also training the small stabilizers that support ankle strengthening, and they are a staple in physical therapy protocols for hikers with recurring ankle pain.
Day two shifts focus to leg balance and controlled step downs, integrating the whole body. Combine single leg stands, eyes open and then closed, with slow step downs from a low platform, making sure the knee tracks over the toes and the hips stay level as the free foot touches the floor. This day pairs well with a broader leg conditioning plan such as the structured trail leg program described in this half dome training guide, which emphasizes real world hiking strength rather than isolated gym numbers.
Day three emphasizes lateral strength and ankle stability using a resistance band around the ankles or just above the knees. Stand with feet width apart, slight bend in the knees, then take small side steps while keeping constant band tension and the heels and balls of the feet grounded, which lights up the hips, lower leg and foot stabilizers. Finish with a short session of gentle ankle circles and toe scrunches on the floor to maintain ankle mobility, and you have a complete ankle strengthening for hiking routine that respects both time and joint health.
Mobility versus stability, trekking poles and when to see a professional
Hikers often confuse ankle mobility with ankle stability, yet the two qualities serve different roles on the trail. Mobility describes how far the ankle can move through dorsiflexion and plantar flexion, while stability describes how well the joint can hold position under load when the ground shifts under your feet. For autumn hiking, you need enough mobility to let the knee track forward over the toes on descents, but not so much laxity that the ankle rolls easily when you land on the side of a rock.
Simple mobility exercises, such as rocking the knee over the toes while the heel stays on the floor, can improve dorsiflexion without sacrificing control. Stand facing a wall with one foot forward, heel planted and toes pointing straight, then gently drive the knee toward the wall while keeping the heel down, repeating for several slow repetitions per side. This kind of controlled exercise is common in physical therapy settings because it improves functional range for hiking without encouraging the kind of loose joint that invites injury.
Trekking poles change the equation on steep or slippery descents by adding two extra points of contact and shifting some load from the lower leg to the upper body. When used well, poles reduce peak forces at the knee and ankle, especially when your feet hit wet leaves over rock or hidden ice in shaded gullies. They are not a substitute for ankle strengthening, but they buy you extra time to react when the trail surface suddenly disappears under your heels.
Many hikers talk about having a weak ankle when the real issue is an old ankle sprain that never received proper rehabilitation. If you notice persistent ankle pain, repeated ankle sprains on the same side, or visible swelling after modest hikes, it is time to consult qualified physical therapists who understand hiking demands. They can assess leg balance, foot mechanics and overall body alignment, then prescribe targeted strengthening exercises and manual techniques that go beyond generic home routines.
Seek professional help immediately if you cannot bear weight on the foot, if the pain is sharp and localized over the bone, or if the ankle feels unstable even on flat indoor floors. Those signs suggest more than simple strain and may indicate ligament or bone injury that requires imaging and structured physical therapy. Respecting these red flags protects your long term health and keeps ankle strengthening for hiking in the realm of smart preparation rather than emergency recovery.
Integrating ankle work with boots, poles and real trail habits
Strong ankles are only useful if your hiking habits and gear choices let them work effectively. Boots with overly soft midsoles or sloppy heel cups can undermine ankle stability by letting the foot slide inside the shoe, while overly stiff models can limit ankle mobility and force the knee and hip to compensate. Aim for footwear that locks the heel, supports the arch and lets the toes splay naturally, so the balls of the feet can read the ground and transmit information to the rest of the body.
On trail, think about how you place each foot rather than just where you place it. Land with the whole foot when possible, letting the heel kiss the ground before smoothly loading the midfoot and toes, instead of stabbing down on the edge of the sole, which increases the risk of rolling to the side. When you must step on loose rock or wet roots, shorten your stride, keep your center of mass over the feet and use trekking poles to widen your base of support.
Daily life offers countless chances to sneak in ankle strengthening for hiking without a formal workout. Stand on one leg while brushing your teeth, rise onto your toes while waiting for coffee, or perform gentle calf raises at your desk with the heels lifting off the floor and lowering under control. These micro sessions keep the lower leg and foot engaged, reinforcing the more structured strengthening exercises you perform on your three dedicated training days.
Nutrition and recovery matter as much as sets and reps when you are asking small stabilizing muscles to work harder. A balanced diet that supports connective tissue health, adequate hydration and consistent sleep all help the ankle and knee tolerate the repetitive stress of hiking over uneven ground. For more ideas on building supportive habits around your training, including smarter trail meals that fuel joint recovery, see this piece on elevating your morning meal on the trail.
Ultimately, preventing fall’s most common trail falls is less about heroic strength and more about quiet consistency. A few minutes of focused work on the floor, a resistance band looped around your feet and a habit of mindful foot placement will do more for your ankle health than any marketing claim on a boot box. The trail rewards the hiker who trains the small things, because what saves you on wet leaves and loose rock is not the waterproof rating, but the tenth river crossing.
FAQ
How often should I do ankle strengthening for hiking in the fall
Most hikers benefit from ankle strengthening for hiking three days per week, with at least one rest day between sessions. This frequency gives the lower leg and foot muscles enough stimulus to improve without causing excessive fatigue or pain. On non training days, light walking and gentle mobility exercises help maintain ankle mobility without overloading the joint.
Which ankle exercises give the best protection against ankle sprains
The most protective ankle exercises combine strength and balance, such as single leg stands, calf raises off a step and lateral band walks. These moves train the ankle to hold position when the ground shifts, which is exactly what happens on wet leaves and loose rock. Adding controlled step downs further prepares the knee and hip for downhill hiking, reducing the overall risk of injury.
Do trekking poles really reduce ankle and knee pain on descents
When used correctly, trekking poles reduce peak forces on the ankle and knee by sharing load with the upper body. This effect is especially noticeable on long, steep descents where the quadriceps and calf would otherwise absorb every impact. Poles do not replace ankle strengthening for hiking, but they complement it by giving you more time and stability when the trail surface is unpredictable.
How can I tell if my ankle pain needs physical therapy
Persistent ankle pain that lasts more than a few days after hiking, repeated ankle sprains on the same side or a feeling of instability on flat ground all suggest you should see a physical therapist. Sudden swelling, inability to bear weight or sharp pain over the bone are stronger warning signs that require prompt medical evaluation. A qualified professional can assess ankle mobility, leg balance and overall body mechanics, then design strengthening exercises tailored to your hiking goals.
Can I still hike while doing ankle strengthening after an old sprain
Many hikers can continue gentle hiking while performing ankle strengthening after an old sprain, as long as pain stays mild and does not worsen during or after walks. Start with easier terrain, use trekking poles and wear supportive boots while you rebuild ankle strength and balance. If pain increases, swelling returns or the ankle feels unstable, reduce hiking intensity and consult a physical therapist for a more structured plan.
References
American Physical Therapy Association (APTA)
American College of Sports Medicine (ACSM)
National Strength and Conditioning Association (NSCA)