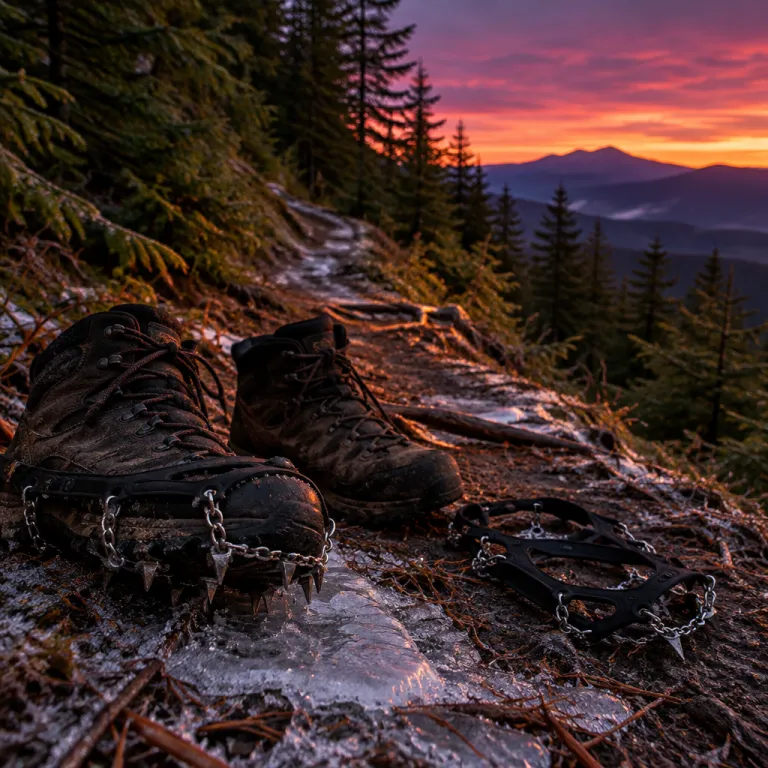
Where the trail ices first and why microspikes matter
Late October lulls strong hikers into complacency on familiar routes. The lower trail can feel dry and fast while north facing switchbacks above 2 000 meters hide hard ice under a dusting of snow. That is exactly where microspikes for hiking quietly shift from optional accessory to essential traction device.
On these shaded aspects, overnight freeze thaw cycles turn seepage into invisible ice snow ribbons. You step from grippy dirt onto glassy snow ice, and suddenly even aggressive hiking boots with deep lugs feel like skates. Lightweight traction devices with steel spikes bridge that gap between bare rubber and full alpine crampons when the trail is still in shoulder season mode.
Think of microspikes as flexible trail crampons tuned for walking, not climbing. A good pair uses stainless steel chains and steel spikes under the forefoot and heel, all held by an elastomer harness that stretches securely over hiking boots or stiff trail shoes. On packed snow and refrozen boot tracks, those small spikes crampons bite just enough to keep your center of gravity over your feet.
North facing gullies, shaded traverses, and creek crossings are the classic first frost traps. Even when no snow is visible at the trailhead, expect ice snow above 1 800 to 2 100 meters on those aspects after a clear cold night. If you plan winter hiking style mileage in late fall, you plan for traction winter conditions even when the forecast only says "chilly and dry".
Headlamps matter here too because early starts and early sunsets push you into dim light on slick tread. Pairing reliable lighting with microspikes for hiking lets you read sheen, texture, and runout on icy slabs instead of guessing. For a deeper dive on beam patterns and red modes that actually work for pre dawn ascents, see this guide to the best headlamps for serious hiking.
How microspikes work, and where crampons take over
Microspikes for hiking sit in the middle of a traction spectrum. At one end you have nothing on your soles, relying on rubber and careful footwork, and at the other end you have rigid mountaineering crampons built for front pointing on steep alpine ice. Microspikes and trail crampons fill the broad, messy middle where fall and early winter hikers actually spend their time.
Most modern traction devices use a stretchy elastomer harness that wraps around hiking boots or trail runners. Underfoot, chains connect multiple clusters of stainless steel spikes, usually 8 to 12 per foot, which spread your weight pair across many small contact points. When you load each spike, it cuts through thin ice or consolidated snow and finds purchase in the firmer layer beneath.
Models like Kahtoola Microspikes and the Hillsound Trail Crampon series are purpose built for this shoulder season work. The Kahtoola microspikes design favors flexibility and a relatively low weight per pair, which suits long hiking days on rolling terrain. Hillsound Trail Crampon options add slightly longer steel spikes and a more aggressive pattern that feels closer to a light crampon on steeper forested hills.
There are also lighter traction cleats such as Yaktrax Walk and Yaktrax Diamond Grip, which use coiled steel or diamond grip chains instead of true spikes. These traction cleats and ice cleats shine on mixed snow ice in town or on flat forest roads, but they lack the deep bite of spikes crampons on steeper, refrozen trails. When the slope angle increases or the runout becomes serious, you want real steel spikes underfoot, not just coiled wire.
True crampons from brands like Black Diamond step in when terrain shifts from hiking to climbing. If you are front pointing on hard blue ice, edging on frozen waterfalls, or moving on technical alpine ridges, microspikes for hiking are out of their depth. That is the hard line ; if you would be scared to slide, and the surface is bulletproof ice, you either bring a full crampon or you turn around.
Choosing, fitting, and carrying traction for real trails
Picking the best microspikes for hiking starts with your footwear, not the marketing copy. A stiffer hiking boot upper and midsole hold a traction device more securely than a soft, highly flexible trail runner. If your hiking boots fold in half when you twist them, expect more rolling and less precise spike placement on hard ice.
Kahtoola, Hillsound Trail, Yaktrax, and Black Diamond all publish sizing charts, but you still need to test fit at home. Mount the elastomer harness over your actual boots, check that the chains sit centered, and confirm that no steel is biting into leather or fabric uppers. Walk on a safe surface and feel for any rolling or slop ; if the traction device shifts, size down or choose a different model.
Weight per pair matters for thru hikers counting grams, yet durability matters more when you are kicking through mixed rock and snow. Stainless steel chains and hardened steel spikes resist rust and deformation better than cheaper mild steel, especially when you are grinding over frozen gravel. Expect to pay a higher price for that stainless steel construction, but also expect fewer broken links halfway through winter hiking season.
Retailers such as Amazon make it easy to compare models, but the lowest price rarely equals the best long term value. Look closely at weld quality, spike length, and how the elastomer harness is anchored to the chains, because those are the usual failure points after 300 to 500 kilometers. When you read reviews, filter for people who actually used their traction devices on real mountain trail conditions, not just on a driveway after one snowstorm.
Carrying microspikes for hiking is half the battle because gear left in the car does nothing on a shaded ridge. Use a dedicated pouch or a small accessory organizer clipped to your pack so wet ice cleats do not shred other equipment. For a smart way to keep sharp metal away from down jackets and dry bags, study how a portable accessory carrier for mountaineers can streamline your winter hiking kit.
Reading conditions, pairing with boots, and knowing when to turn back
Good traction starts in your head before it ever touches your soles. When you plan a route, note every north facing traverse, gully, and switchback above 1 800 meters, because those are your likely ice zones. Then layer in time of day, recent precipitation, and overnight low temperatures to build a mental map of where microspikes for hiking will probably come out of the pack.
On the ground, read the surface like a slow moving river. Shiny, almost wet looking patches on dirt often signal thin ice, while a dull, chalky texture suggests grippier frozen mud or packed snow. If your poles start skittering on descent, that is your early warning that traction devices or ice cleats should go on before you hit the steepest section.
Footwear pairing is not just about comfort ; it is about how well your traction device stays aligned under load. Traditional leather hiking boots with a firm heel counter and torsional stiffness keep Kahtoola Microspikes or a Hillsound Trail Crampon centered even when you edge on sidehill ice. Soft knit uppers and very flexible midsoles can let the spike clusters roll, which feels unnerving on exposed traverses.
Trekking poles are your quiet insurance policy on glazed descents. Plant them slightly ahead and downhill, test each placement, and let your arms share some of the braking load that would otherwise go entirely through steel spikes and rubber soles. On long days that start in town and end on frozen singletrack, poles plus traction cleats can mean the difference between a controlled descent and a bruising slide.
There is also the style side of cold weather gear, especially when you move between alpine towns and serious winter trails. Matching insulated pants, gaiters, and snow capable boots with low profile traction devices keeps you warm and surefooted without looking like you just left a glacier camp. For ideas on balancing function and aesthetics in cold conditions, this piece on styling snow boots for real winter trails offers practical combinations that still respect technical needs.
The final skill is knowing when microspikes for hiking are no longer enough. If you are facing continuous hard ice with bad runouts, or if wind crust hides breakable layers over rock slabs, treat that as crampon or turn around terrain. The mountain will be there next week ; your knees and spine will thank you for walking away when your traction winter setup does not match what the trail is throwing at you.
FAQ
When should I carry microspikes for hiking in the shoulder season?
Carry microspikes whenever your route crosses north facing slopes above roughly 1 800 meters after a clear cold night. Even if the lower trail is dry, shaded gullies and switchbacks can hold ice snow for days. If you would not be happy glissading a section in trail runners, pack traction devices.
Are microspikes enough, or do I need full crampons for winter hiking?
Microspikes and trail crampons are ideal for packed snow, icy forest roads, and moderate trails with limited exposure. Full crampons are the safer choice on steep, continuous hard ice or technical alpine routes where a slide would have serious consequences. When in doubt, match your traction to the steepest, iciest section you might encounter, not the trailhead conditions.
Do microspikes work better with hiking boots or trail runners?
They generally perform more predictably with stiffer hiking boots that have solid heel counters and torsional rigidity. That structure keeps the elastomer harness stable and the steel spikes aligned under your foot on sidehill ice. Ultralight trail runners can work, but expect more rolling and faster wear if you often cross mixed rock and snow.
How long does a typical pair of microspikes last on real trails?
With stainless steel chains and hardened steel spikes, many hikers see several hundred kilometers of use on mixed snow and dirt. Frequent contact with bare rock, road walking, and storage while wet will shorten that lifespan. Inspect links, welds, and the elastomer harness regularly, and retire the traction device at the first sign of cracks or stretched attachment points.
Are cheaper traction cleats from Amazon good enough for mountain trails?
Budget traction cleats from large online retailers can work for city sidewalks or flat park paths. For mountain hiking where falls have higher consequences, you want proven designs from brands that specialize in traction devices and crampons. Paying more up front for robust chains, reliable elastomer harnesses, and well tempered steel spikes is cheaper than a slide into talus.