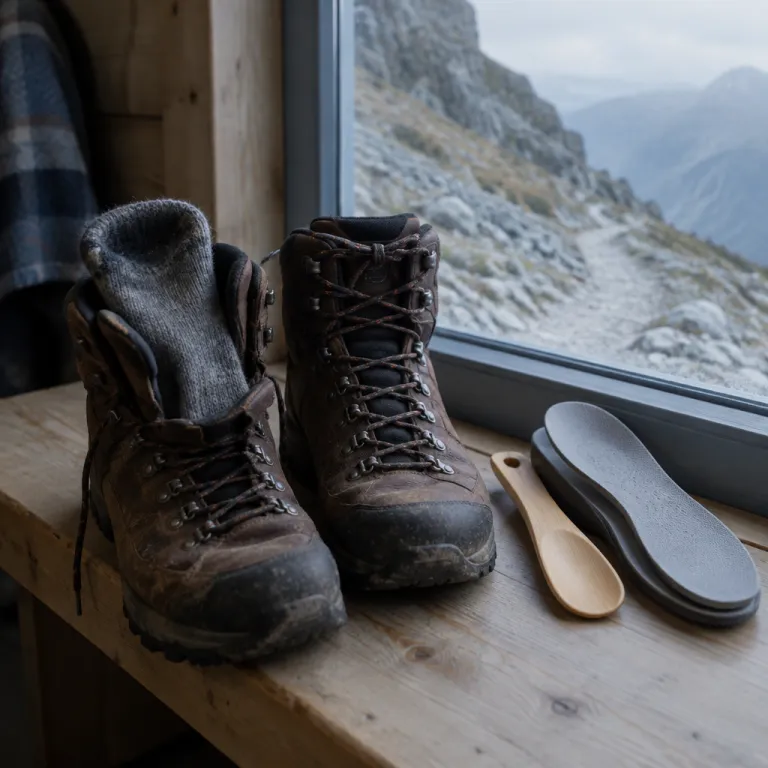
Why black toenails happen on long descents
Black toenails after hiking are not a badge of honor ; they are a sign that your fit, lacing, or technique is off. When your foot slides forward inside the shoe on steep descents, each step drives the toe into the toe box and hammers the nail. That repetitive impact bruises the nail bed, traps blood beneath the nail, and eventually turns the toenail dark and painful.
On long downhill sections, the combination of gravity, speed, and swelling increases pressure on every toe. The front of the foot rams the inside shoe, the nail plate acts like a tiny anvil, and the soft tissue beneath nail absorbs the trauma. Over a few kilometers of running hiking or fast hiking, that subungual hematoma builds up, the surrounding skin becomes tender, and the black discoloration appears days later.
Most hikers blame the wrong thing ; they think the nail itself is weak or that a single rock caused trauma. In reality, black toenails hiking problems almost always come from a mismatch between foot length, shoe volume, and lacing tension. If the shoe is even half a size too small, or the toe box is too low, pressure pain concentrates at the front, the nail grows damaged, and repeated injury turns one black toenail into several black toenails over a season.
Foot shape matters as much as shoe size, especially when the foot ankle complex works hard on technical descents. A long second toe, a wide forefoot, or a high instep all change how the toe box feels once the skin warms and the foot swells. When the fit is wrong, the nail bed takes the hit, the toenail fungus risk rises later if the damaged nail lifts, and the toenail fall problem becomes a recurring theme after every big mountain day.
Think of each toenail as a sensor reporting on impact and pressure, not as a disposable casualty. If you finish a hike with throbbing toe pain, visible changes in nail color, or dark streaks beneath nail edges, your gear and technique need a reset. Black toenails are preventable injuries, not inevitable side effects of loving steep trails.
The fit test that stops downhill nail trauma
Start with the simplest fix ; get the right size and shape of hiking shoe for your foot. Your trail size is usually larger than your street size, because the foot swells and lengthens under load and repeated impact. Aim for roughly a thumb width of space between the longest toe and the end of the toe box when standing, with the heel locked and the midfoot snug.
Good shops use a downhill ramp to test fit, and you can copy that at home with a board and a stack of books. Lace the shoes as you would for hiking, stand on the ramp, and gently bounce to simulate running hiking or fast descents. If the foot slides forward, the toes hit the front, or you feel pressure pain at the nail bed, the shoe is either too short, too low in volume, or not laced correctly.
Pay attention to width and volume, not just length, because the surrounding skin and soft tissue need room to move. A wide forefoot crammed into a narrow shoe creates side pressure on every toenail, which can cause dark bruising at the nail edges even when the length seems fine. When the upper collapses onto the nail plate, especially in lightweight trail shoes, the repeated micro trauma can cause black toenails without any obvious single impact.
Downhill heavy routes magnify small fit errors, especially when the pack weight increases the load on each foot ankle step. If you hike in the Rockies, the Whites, or the Sierra, size your hiking shoes for your steepest descent, not your flattest local loop. That usually means going up half to a full European size, choosing a higher volume toe box, and accepting a slightly roomier feel that still keeps the heel secure.
Balance and body control also influence how much pressure reaches the toe and nail. Strong ankles and good proprioception reduce stumbles, which in turn reduces sudden caused trauma to the nail bed and surrounding skin. For more detail on how lower limb stability prevents falls that can escalate a minor nail injury into a bigger problem, see this guide on common trail falls and ankle control.
Lacing techniques that lock the heel and save the nail bed
Even with the right size, sloppy lacing lets the foot slide forward and punishes every toenail on the way down. The goal is simple ; lock the heel, stabilize the midfoot, and leave just enough freedom at the toes to wiggle without banging. Done right, lacing becomes your first line of defense to prevent black bruising and subungual hematoma on big descents.
Use a heel lock, sometimes called a surgeon’s knot, at the top two eyelets of the shoe. Snug the laces over the instep to hold the foot ankle complex back, then loop the lace through the final eyelet on the same side to create a small lock before crossing over. This technique anchors the heel in the pocket, reduces forward slide inside shoe, and dramatically cuts pressure pain at the front of the toe box when hiking down loose, steep trails.
On very long days, adjust tension mid hike as the foot swells and the skin softens. If the laces are too loose, the toes slam forward and the nail plate takes the impact ; if they are too tight, you trade nail trauma for numbness and hot spots. Aim for a firm wrap over the midfoot with slightly looser tension over the forefoot, so the surrounding skin can move while the heel stays planted.
Different boots respond differently to lacing tweaks, and you should test them before committing to a big alpine route. Stiff leather boots with a tall cuff often need a more aggressive heel lock, while softer trail runners benefit from a midfoot surgeon’s knot to control volume. If you rely on ankle braces for extra support, integrate them into your fit testing and review this piece on enhancing stability with ankle braces so the brace, sock, and shoe work together instead of adding extra pressure over the nail bed.
Remember that lacing is not a one time decision at the trailhead. Adjust before long descents, after river crossings that soak the skin, and whenever you feel new pressure on a toe or nail. A thirty second relace can save a toenail from turning black and prevent weeks of avoidable pain.
Technique, socks, and toe box volume on steep descents
How you move downhill matters as much as what you wear on your feet. Long, bounding strides load the front of the foot, slam the toes into the toe box, and turn each toenail into a tiny brake pad. Shorter steps, bent knees, and engaged quads spread the impact across the whole foot ankle chain instead of concentrating it at the nail bed.
Use trekking poles on sustained descents to unload the toes and reduce pressure pain. Each plant of the pole takes a percentage of your body weight off the front of the foot, which means less trauma beneath nail surfaces and less risk of subungual hematoma. On loose rock or wet roots, poles also cut the chance of sudden slips that can cause dark bruising, acute injury, or even a toenail fall from a single hard impact.
Socks are underrated tools in the fight against black toenails hiking issues. A thin, snug synthetic or merino sock reduces friction between skin and fabric, while a well placed heel cup keeps the foot from swimming inside shoe space. Avoid thick, sloppy socks that bunch under the toes, because those folds create extra pressure on the nail plate and can cause changes in nail shape over time.
Toe box volume must match both your foot and your terrain. Wide feet crammed into narrow shoes create constant side pressure on the surrounding skin and nail edges, while very high volume shoes let the foot slide and hammer the front. Aim for a fit where each toe can wiggle freely, the toenails do not touch the upper when you flex, and the shoe bends roughly where your forefoot bends during hiking.
On multi day trips, rotate socks and let both shoes and skin dry fully overnight. Damp skin is softer and more vulnerable to impact, which makes every small trauma to the nail bed more likely to turn into a dark bruise or even a fungal infection later. Smart pacing, careful footwork, and the right fabric next to your skin work together to prevent black toenails before they start.
Nail care, fungal risks, and when to seek medical help
Trail ready nail care is simple ; keep each toenail short, smooth, and squared off before big descent days. Long nails act like levers, catching the toe box and multiplying impact at the nail bed with every step. Trim straight across, file any sharp corners, and avoid cutting so short that you expose tender skin or invite ingrown edges.
After a hard hike, inspect every toe for discoloration, swelling, or heat. A fresh subungual hematoma often looks like a dark red or purple patch beneath nail, and it may throb with pressure pain when you touch it. If the pain is intense, the nail lifts, or the surrounding skin looks infected, seek medical care promptly rather than waiting for the toenail fall event to happen on its own.
Damaged nails are more vulnerable to fungal infection, especially when they stay damp in closed shoes. When the nail plate separates from the nail bed after caused trauma, tiny gaps allow moisture, dirt, and fungi to enter. Over time, the nail grows thick, crumbly, and yellow, classic signs of toenail fungus that can be stubborn to treat and may require you to request appointment with a podiatrist or dermatologist.
Not every black toenail is an emergency, but some are more than just hiking souvenirs. If you notice streaky dark changes that do not grow out with the nail, or if only one nail shows persistent discoloration without a clear injury, you should seek medical evaluation to rule out more serious causes. When in doubt, especially if you have diabetes, circulation problems, or repeated nail injuries, it is safer to request appointment early than to ignore a small but important warning sign.
Good hygiene supports recovery and prevention for both single nail and multiple toenails. Wash and dry the feet thoroughly after hiking, change into breathable shoes or sandals, and let the skin and nail bed breathe. If a black toenail is loose but still attached, protect it with tape or a bandage, avoid ripping it off, and let the new nail grows in safely underneath.
Boot and shoe choices that actually prevent black toenails
Gear will not fix bad technique, but the right shoe makes prevention much easier. For steep, rocky trails, choose hiking shoes or boots with a firm toe box, a rock guard, and enough vertical volume that the upper never presses directly on the nail plate. A slightly stiffer forefoot spreads impact across the whole foot instead of letting each toe take the hit alone.
Match the midsole and outsole to your terrain and pace, because cushioning changes how much impact reaches the nail bed. Ultralight trail runners feel great on soft dirt but can transmit more shock to the toes on sharp rock, especially when the foam packs out after a few hundred kilometers. Traditional boots with denser midsoles may feel harsher at first yet often protect the nail and surrounding skin better on long, technical descents.
Pay attention to how the shoe behaves after it is broken in, not just out of the box. As the upper stretches and the midsole softens, the foot may slide more inside shoe space, increasing pressure on the toes and raising the risk of black toenails hiking problems. If you start to feel new pressure pain at the front or see fresh discoloration beneath nail surfaces after months of comfort, it may be time to retire that pair before a bigger injury.
For mixed terrain trips that combine long climbs, rough descents, and big mileage, consider rotating between two pairs of shoes. A cushioned, roomy pair can handle flatter approaches and easier days, while a more protective, precise pair takes over for the steep, rocky sections that threaten every toenail. Planning your footwear with the same care you plan your nutrition, using resources like this guide to essential hiking snacks, keeps both your energy and your feet in better shape.
Whatever you choose, treat black toenails as feedback, not fate. If a new boot model consistently leaves one toe black or painful, change something ; size, width, lacing, sock thickness, or even the brand’s last. The goal is simple and achievable ; finish big mountain descents with tired legs, intact nails, and no need to request appointment for preventable nail trauma.
Putting it all together on real trails
Think of your next descent as a field test for everything you have just adjusted. Before you drop off the pass, check your lacing, confirm that the heel is locked, and make sure each toe can wiggle without touching the toe box. As you start down, pay attention to any early pressure pain at the front of the foot and fix it immediately instead of waiting for the nail bed to complain later.
Use the terrain to refine your technique and protect every toenail. On smooth, moderate grades, practice shorter steps and soft landings that spread impact across the whole foot ankle chain rather than slamming the forefoot. When the trail steepens or turns rocky, slow down, engage your quads, and use poles if you carry them, because each controlled step is one less micro trauma beneath nail surfaces.
After the hike, treat your feet like critical gear, not an afterthought. Take off your shoes and socks, wash away grit, and inspect the skin and nails for early changes in color or tenderness. If you see new dark patches, feel throbbing beneath nail, or notice that a toenail lifts when pressed, mark that as data and adjust your fit, lacing, or shoe choice before the next big outing.
Over a season, this feedback loop turns black toenails hiking problems from a recurring mystery into a solved puzzle. You will learn exactly how much space your toes need, which socks keep the surrounding skin happiest, and how tight to lace before a thousand meter descent. The payoff is simple ; more confidence on steep ground, fewer forced rest days for nail injuries, and a long term relationship with your feet that feels like a partnership instead of a series of small, preventable battles.
Key figures on black toenails and hiking injuries
- Studies of endurance runners and hikers report that up to 14–20 % of participants experience at least one black toenail per long event, highlighting how common subungual hematoma is when fit and lacing are not optimized.
- Research on downhill walking biomechanics shows that ground reaction forces at the forefoot can increase by roughly 30–40 % compared with level walking, which explains why toe and nail bed trauma clusters on steep descents rather than climbs.
- Clinical data on nail injuries indicate that most traumatic subungual hematomas resolve without complications, but nails that are more than 50 % covered by dark blood beneath nail surfaces have a higher risk of nail plate detachment and secondary infection.
- Surveys of hikers with foot problems suggest that those who wear trail footwear at least half a size larger than their street shoes report fewer black toenails and less pressure pain at the toes, especially on multi day trips with heavy packs.
- Medical reviews of onychomycosis, the technical term for toenail fungus, estimate that prior nail trauma increases the risk of later fungal infection by two to three times, underscoring the value of preventing repeated nail injuries on the trail.
FAQ about black toenails on descents
Why do my toenails turn black only after downhill hikes ?
Downhill hiking shifts your body weight forward and increases impact on the front of the foot, so the toes repeatedly hit the toe box. That repetitive trauma bruises the nail bed, traps blood beneath nail surfaces, and creates the dark discoloration people call a black toenail. Climbs rarely cause the same problem because the load stays more on the midfoot and heel.
Should I be worried about a single black toenail after a long hike ?
A single black toenail after a big descent is usually a minor subungual hematoma from localized trauma. Monitor it for increasing pain, swelling, or signs of infection in the surrounding skin, and protect it while the nail grows out. If the pain is severe, the nail lifts, or you have medical conditions like diabetes or poor circulation, seek medical evaluation promptly.
How can I prevent black toenails on my next mountain trip ?
Prevention starts with proper fit ; choose hiking shoes with a thumb width of space at the front, a secure heel, and enough toe box volume for your foot shape. Use heel lock lacing to stop forward slide, trim each toenail short and square, and wear snug, non bunching socks that keep the skin dry. Combine that with shorter downhill steps, engaged leg muscles, and trekking poles to reduce impact on the nail bed.
When does a black toenail need medical attention instead of home care ?
You should request appointment with a clinician if the pain is intense, the nail is more than half covered by dark blood, or the surrounding skin looks red, hot, or draining. Sudden changes in nail color without a clear injury, or a black streak that does not move as the nail grows, also warrant prompt evaluation. In those cases, early diagnosis is safer than waiting for the toenail fall event or trying to treat it alone.
Can black toenails lead to toenail fungus or long term nail damage ?
Yes, repeated nail trauma can lift the nail plate from the nail bed and create spaces where moisture and fungi thrive. Over time, that can lead to toenail fungus, with thick, discolored nails that are harder to treat and may never return fully to normal. Protecting the nails from impact, keeping the feet dry, and addressing each black toenail early all reduce the risk of long term damage.