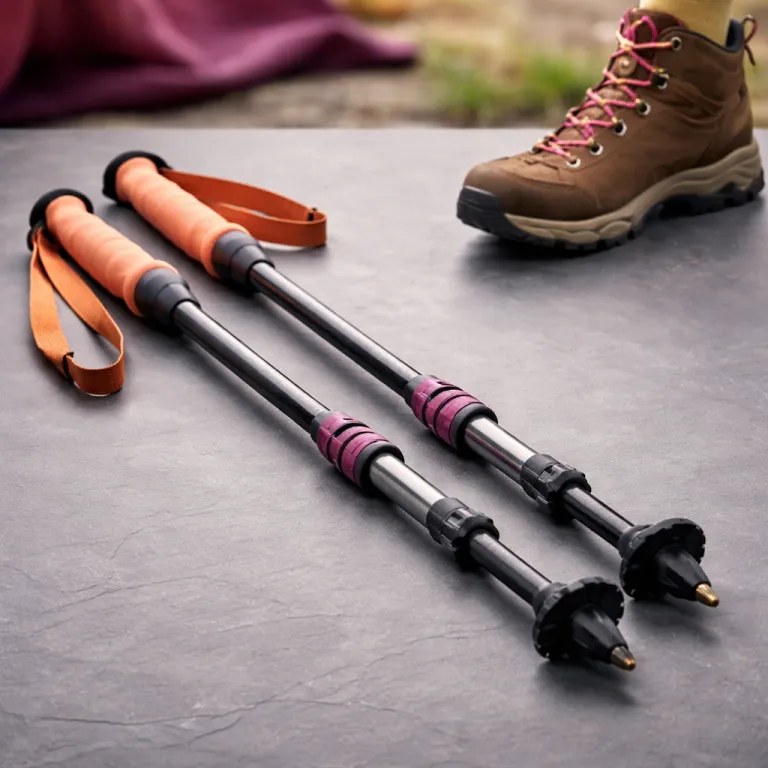
Setting up trekking poles so they actually protect your knees
Most hikers buy trekking poles, clip them to the pack, and keep walking. When you learn how to use trekking poles with correct pole length and strap technique, those same poles will quietly shave compressive force off your knees on every step. Think of them as load sharing devices for your legs and upper body, not as fashion accessories swinging from your pack.
Start on flat terrain with the pole tip beside your boot and your elbow bent at roughly ninety degrees. That neutral pole length is your baseline for all other pole techniques, whether you are on rocky terrain, mud snow, or a smooth forest trail. From there you will shorten or lengthen the trekking pole by about five to ten centimetres as the gradient changes, instead of leaving the poles long and wondering why your IT band still screams on descents.
For adjustable hiking poles, open each of the pole sections evenly so the locking mechanism sits near the middle of its range. This balanced setup keeps the weight distribution predictable and makes it easier to tweak pole length quickly when the terrain shifts from firm walking to uneven terrain or water snow crossings. Fixed length carbon fiber poles feel lighter in the hand, but beginners usually benefit from the flexibility of adjustable walking poles while they learn how to use trekking poles in varied terrain.
Slide your hand up through the strap from below, then lay your palm down on the grip so the strap runs under your wrist. This strap technique lets the strap carry much of the downward force, so your arms and shoulders guide the pole instead of death gripping the handle with tired arms. When your arms legs and core share the load with your trekking poles, you reduce strain on the knees and gain extra support without adding much weight to your overall gear list.
Climbing with trekking poles so every step drives you uphill
On climbs, shorten each trekking pole by five to ten centimetres from your flat ground baseline. The goal is to keep your elbow near ninety degrees when the pole tip is planted slightly uphill, which keeps your upper body stacked over your legs instead of dragging behind them. If your poles are too long on a climb, your arms reach high, your shoulders shrug, and your support vanishes just when the trail gets steep.
Use an opposite pole opposite foot rhythm, planting the right pole as the left foot steps forward. This diagonal pattern stabilises your hips, lets your arms legs share the work, and keeps your centre of gravity moving smoothly forward instead of bobbing up and down. When the terrain turns into uneven terrain with roots or rocky terrain steps, exaggerate that timing so the trekking pole plants a fraction of a second before the foot, giving you a solid third point of contact.
Think of three contact points at all times on steep terrain, whether that is two feet and one pole or one foot and two poles. On long climbs, this three point stance spreads the load across your upper body and legs, which can reduce fatigue and help you maintain a steady walking pace. If you feel your calves burning while your arms feel fresh, you probably have the poles trekking too short or are planting the poles behind your hips instead of slightly forward.
When climbing in snow or mixed mud snow, use larger baskets on your hiking poles so they do not punch too deep. Shorten the pole length a touch more than usual, because the tips will sink into soft water snow and you still want that ninety degree elbow angle. For more detailed essential advice for using hiking poles effectively, match these adjustments with your boot traction and the rest of your gear so the whole system works together.
Descending with trekking poles so gravity stops beating up your joints
On descents, lengthen each trekking pole by five to ten centimetres from your flat ground setting. The key detail nobody explains clearly is that the pole tips should land slightly ahead of your centre of gravity, catching your weight before your lead foot fully commits. If the poles are too short, you end up leaning forward with bent arms and your knees still take the full hit on every step.
As you walk downhill, plant both walking poles just in front of you, then step down into that support. On moderate terrain, alternate the poles trekking in the same opposite pole opposite foot rhythm you used on the climb, but let the poles land a heartbeat earlier. On very steep or loose rocky terrain, you can briefly plant both poles together for extra support, then take a controlled step down, repeating this three beat pattern until the slope eases.
Use your arms and upper body like shock absorbers, letting the straps carry much of the impact while your hands steer. This technique can reduce the compressive force on your knees by up to a quarter, which is exactly why trekking poles are often called cheap knee insurance by guides who spend long seasons on trail. If your shoulders feel jammed or your elbows lock out, your poles are probably too long, so shorten the pole length by a couple of centimetres and reassess.
In wet rock, mud snow, or shallow water snow, angle the pole tips slightly backward so they do not skid forward. Carbide tips on most hiking poles bite well, but carbon fiber shafts can snap if you wedge them between boulders and fall onto them. For more essential tips for using trekking poles effectively, practise these pole techniques on a short local descent before trusting them on a multi day trail where every mistake adds up.
Choosing and adjusting trekking poles for real world mountain terrain
For your first serious trip, adjustable trekking poles are usually the smarter buy than fixed length models. Being able to change pole length for climbs, flats, and descents teaches you how to use trekking poles as dynamic tools instead of static crutches. Once you know your preferences across different terrain, you can decide whether ultralight fixed length carbon fiber poles make sense for your style.
Look for three section designs with a reliable locking mechanism that you can operate with gloves in snow or with cold wet hands. External lever locks are poles common on mid range hiking poles, and they are easier to adjust quickly than twist locks when the trail suddenly tilts steeply upward. Folding designs with separate pole sections pack smaller on your pack, but they sometimes offer less adjustment range, so check that the stated pole length covers your height and intended use.
Weight matters, but not at the expense of durability on rocky terrain or in mixed water snow conditions. Ultralight carbon fiber trekking pole models like the Black Diamond Distance Carbon Z or Gossamer Gear LT5s feel almost invisible in hand, yet you must treat them carefully around boulders to avoid side loading the shafts. Aluminium walking poles weigh a bit more, yet they usually bend instead of snapping, which many mountaineers prefer when far from help.
When you stow your poles for technical scrambling, boulder fields, or icy steps without specialised tips, collapse the pole sections fully and secure them under side compression straps. Poles long and loose on the outside of a pack can snag rock or brush, so take the extra moment to lock them down. If you are already optimising pack systems and ultralight gear, pairing dialled trekking pole techniques with a carefully chosen pack such as the Mirage 40 described in this analysis of a waterproof pack will make your whole mountain setup feel more coherent.
Trail technique, stowing strategy, and when to leave the poles in the car
On mellow trail, you do not need to obsess over every pole plant. Keep the trekking poles at your flat ground length, swing your arms naturally, and let the tips kiss the ground just before each step to maintain rhythm. If you feel the poles dragging behind you, shorten the pole length slightly so the tips land closer to your body and keep you moving forward.
There are times when the safest choice is to stow the poles and rely on hands and feet. Technical scrambling on exposed ridges, tight boulder fields, or ice patches without specialised whippet style attachments all reward free hands and three points of direct rock contact. In those situations, trekking poles become awkward antennas that can catch wind or snag rock, so collapse the pole sections, secure the gear to your pack, and focus on precise footwork.
On mixed terrain where short rock steps alternate with walking, you can choke up on the pole grip or hold the shaft below the handle. This temporary adjustment effectively shortens the pole without touching the locking mechanism, which keeps your arms legs and torso in a strong position while you clear obstacles. When the trail smooths out again, slide your hands back to the grips and let the straps resume their role in carrying part of your weight.
Pay attention to how your body feels after long days with and without poles. If your knees and hips feel fresher while your triceps and shoulders register mild fatigue, you are probably using the trekking pole support correctly and letting the poles will share the load. The real test of good pole techniques is not how fast you move on one climb, but how your joints feel after three long days of varied terrain, changing weather, and the kind of cumulative impact that quietly ends seasons.
FAQ
How do I choose the right length for trekking poles ?
Start by setting the pole so that on flat ground, with the tip beside your boot, your elbow sits at roughly ninety degrees. Shorten the trekking pole by five to ten centimetres for climbs and lengthen it by the same amount for descents. If you are between sizes on fixed length poles, choose the shorter option for better control.
Are carbon fiber trekking poles worth the extra cost ?
Carbon fiber trekking poles feel noticeably lighter, which reduces arm fatigue on long days. They are excellent for established trail use, but they can be more vulnerable to side impacts on rocky terrain or in boulder fields. Aluminium poles weigh a bit more yet usually bend instead of snapping, which some mountaineers prefer for remote routes.
Should beginners use fixed length or adjustable trekking poles ?
Adjustable trekking poles are usually better for beginners because they allow you to experiment with different pole length settings on varied terrain. Being able to fine tune the length for climbs, flats, and descents teaches you how to use trekking poles as active tools. Once you know your preferences, you can consider lighter fixed length models.
When is it safer to hike without trekking poles ?
It is safer to stow trekking poles during technical scrambling, exposed ridge traverses, tight boulder fields, or icy steps where you need both hands free. In these situations, three points of direct contact between hands, feet, and rock offer more reliable support. Collapse the pole sections, secure them to your pack, and focus on deliberate foot and hand placements.
How do trekking poles help reduce knee pain on descents ?
When set slightly longer for downhill, trekking poles let your arms and upper body absorb part of the impact before your lead foot lands. This shared load can reduce compressive force on the knees by roughly a quarter, especially on long descents with heavy packs. The effect is most noticeable when you plant the poles just ahead of your centre of gravity and let the straps carry much of your weight.