Why carbon trekking poles fail and how maintenance changes everything
Ultralight carbon trekking poles can feel like cheating on long climbs. Once you understand carbon trekking pole maintenance, you start treating them as critical load bearing equipment instead of disposable accessories. That mindset shift keeps your poles working from the first shakedown hike to the last icy summit push.
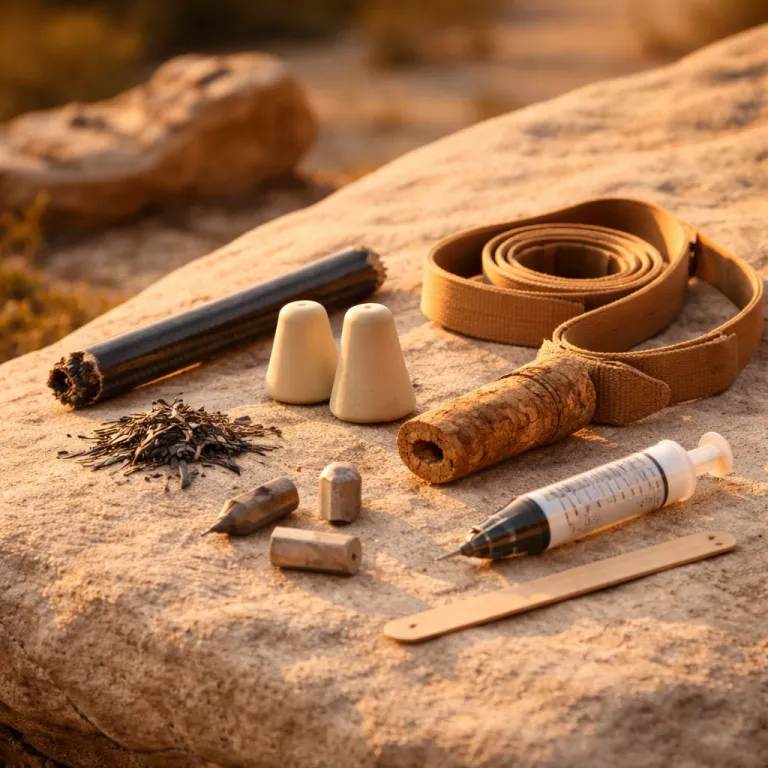
Every hiker who relies on trekking poles should know the three main failure points: carbide tips, straps, and pole shafts, because each part has its own replacement timeline and care pattern. Based on a mix of manufacturer guidance, long distance hiker reports, and my own field notes rather than controlled lab testing, tips usually wear out first between roughly 300 and 500 miles (480–800 km), straps tend to fail between about 800 and 1 200 miles (1 300–1 900 km), while carbon fibre shafts often fatigue somewhere between 1 500 and 2 500 miles (2 400–4 000 km) depending on terrain and pack weight. These ranges are best treated as practical rules of thumb, but if you maintain trekking gear methodically you can push toward the upper end and avoid the classic snap in a boulder gap when you most need support.
Cold embrittlement is the hidden enemy of every carbon trekking pole in winter. Below roughly minus 7 °C (about 20 °F), repeated side loading can encourage micro cracks in carbon fibre that you will not see until the pole suddenly fails, while aluminum hiking poles usually bend first and give you a warning. Brands such as Black Diamond and Leki note in their care guidance that carbon shafts are more vulnerable to impact and cold related damage than aluminum, so I recommend carbon trekking poles for three season hiking and trekking, then switching to aluminum poles whenever you expect sustained temperatures below roughly minus 7 °C or are carrying packs over about 16 kilograms.
On long trek routes like the GR20 or the Colorado Trail, I have watched Black Diamond Distance Carbon Z poles explode on frozen talus where cheaper aluminum models only came back slightly bent. The same pattern shows up with Gossamer Gear LT5 trekking poles, which many thru hikers love for their weight but often report shaft fatigue after roughly 1 500 to 2 000 miles (2 400–3 200 km) of hard use. These are anecdotal field observations rather than controlled product tests, but if you plan a long trek with significant snow travel, treat carbon trekking poles as consumables and budget for at least one shaft or full pole replacement over the life of the trip.
Borrowed poles fail at a higher rate because you do not know their history or how often someone over tightened twist locks or slammed the pole tops into rock. When you inherit or lend a trekking pole, assume the locking mechanisms and expander units have already seen abuse and perform a full pole maintenance session before trusting them on exposed traverses. That extra time spent on careful cleaning and inspection will pay for itself the first time a lock holds on a steep, loose descent.
Cleaning rituals that keep trekking poles reliable on every trek
Proper cleaning is the foundation of carbon trekking pole maintenance, especially after muddy spring hiking or gritty desert trekking. Fine sand and silt work their way into pole shafts, locking mechanisms, and grips, where they grind away at carbon fibre and plastic expanders every time you plant the pole. A five minute cleaning routine after each wet trip will keep trekking systems working smoothly and delay expensive repairs.
Start by taking the pole sections apart completely so you can reach every surface, then rinse the pole shafts with warm water to flush out grit without shocking the carbon with extreme temperature changes. Use mild soapy water and a soft cloth to clean the shafts, grips, and the area around each lock, avoiding harsh detergents that can dry out rubber or foam grips. Once everything is clean, shake off excess water and let the poles dry fully in a shaded, ventilated place rather than leaning them wet in a hot car or tent vestibule.
Locking mechanisms deserve special attention because they fail more often from dirt than from age. For twist lock systems, unscrew the expander, wipe it clean, and lightly roughen glazed plastic with fine sandpaper so it grips again when you maintain trekking gear between big trips. For flip locks and any flick lock style clamp, clean the cam surface, check that the screws are snug but not crushing the carbon, and test each lock under body weight before you pack the poles away.
Carbide tips and baskets also benefit from regular cleaning and inspection after time spent in mud or snow. If you use rubber tip protectors for road approaches or travel, clean inside them as well, because trapped grit can slowly wear the metal tip and the plastic housing. When you want more detail on how rubber accessories change trail feel and noise, look at this guide to rubber tips for walking sticks and then adapt the advice to your own trekking poles.
Once the poles are completely dry, store them with the sections slightly extended and the locks loosened so the expanders are not under constant compression. This habit reduces long term creep in plastic parts and helps extend life for both twist lock and flip lock systems across many seasons. If you are short on time after a trek, at least wipe the lower sections clean and dry so mud does not harden and trap moisture against the carbon fibre.
Locking systems, straps, and grips: small parts that decide big days
Every carbon trekking pole lives or dies by its locking mechanisms, straps, and grips, not just by the advertised weight on the hang tag. A failed lock or a blown strap at the wrong moment can turn a routine river crossing into a dangerous fall, even if the pole shafts are still structurally sound. Treat these small parts as critical safety gear and give them the same maintenance attention you give your crampons or ice axe.
Twist lock systems rely on an internal expander that presses against the inside of the pole, so over tightening them can crush thin carbon fibre and start invisible cracks. When you maintain trekking poles with twist locks, tighten only until the pole holds your full body weight without slipping, then stop and mark that position on the shaft with a fine line so you can repeat it quickly next time. Flip locks and flick lock designs, like those on many Black Diamond hiking poles, use an external cam that is easier to adjust with a small screwdriver and generally kinder to carbon shafts when set correctly.
Straps and grips usually fail from abrasion and sweat rather than sudden trauma, especially on long distance hiking where your hands stay in contact for ten hours a day. Inspect the stitching where the strap meets the pole top and where it passes through the handle, because those points often fray first after repeated trek days with heavy packs. If you notice crusted salt, wash the straps and grips with warm soapy water, then let them dry completely so the webbing does not stiffen and cut into your wrists.
Foam grips on models like the Gossamer Gear LT5 trekking poles compress and polish over time, which can reduce control on steep sidehills when your hands get sweaty. Cork grips, common on premium hiking poles, tend to age more gracefully but still need gentle cleaning and occasional light sanding to restore texture. For a deeper dive into how different handle shapes and materials affect control and fatigue, study this detailed piece on hiking stick handles and then match your grip choice to your usual terrain.
Plan to replace straps somewhere between 800 and 1 200 miles (1 300–1 900 km), or sooner if you do a lot of off trail scrambling where sharp rock edges chew through webbing. Carrying a spare strap or a simple cord loop in your repair kit will keep trekking plans alive if a strap fails mid trek far from the trailhead. Remember that a strong shaft with a broken strap is still usable in a pinch, but a perfect strap on a cracked pole is a liability you should not ignore.
Tips, shafts, and when to switch from carbon to aluminum
Carbide tips are the cheapest part of your trekking poles yet they control how securely you move over rock, ice, and roots. As the tips round off with time, they start to skate on stone and hardpack, which quietly increases your fall risk long before the pole itself fails. Replacing tips on a predictable schedule is one of the simplest carbon trekking pole maintenance habits you can adopt.
Most strong hikers will wear through tips every 300 to 500 miles (480–800 km) depending on how much rock they encounter, so plan ahead and carry spares for big objectives. Black Diamond uses its Flex Tip system, Leki has its own press fit tips, and Gossamer Gear trekking poles use standard threaded tips, so check compatibility before you leave home. The table below summarizes common tip styles so you can match replacements quickly in the field:
Tip compatibility overview
Black Diamond – Flex Tip, press fit
Leki – proprietary press fit tip units
Gossamer Gear – standard threaded tips (compatible with many generic replacements)
When you notice the carbide point looking more like a dome than a cone, swap the tip before your next serious trek rather than waiting for a slip on wet granite to remind you. A simple photo on your phone of a fresh tip versus a worn one can help you judge wear quickly at camp or during a resupply stop.
Shaft failures are rarer but more dramatic, especially when cold embrittlement meets side loading in winter. Watch for subtle signs like hairline cracks near the handle, soft spots where the carbon fibre feels slightly spongy, or faint white lines of delamination around folding joints on models like the Black Diamond Distance Carbon Z. If you see any of these, retire the trekking pole from serious mountain duty and keep it for mellow hiking, because once a crack starts it will eventually propagate under load.
Aluminum poles behave differently in the cold, usually bending before they break, which gives you a chance to react and reduce force. For winter mountaineering, off trail boulder hopping, or loads above about 16 kilograms, I recommend switching from carbon trekking poles to sturdy aluminum hiking poles even if it costs you a few extra grams. The weight penalty is minor compared with the risk of a carbon shaft exploding during a high consequence move on steep snow or talus.
One more practical rule for serious hiker safety is to be cautious with loaner gear. You never know how many times someone else over extended the pole sections, slammed the pole tops into rock, or left the shafts wet and frozen overnight. When in doubt about a pole’s history, treat it as suspect, perform full pole maintenance, and limit it to low risk hiking until you trust it again.
Field tested routines to extend life on long distance routes
On multi week treks like the Haute Route or a long section of the Pacific Crest Trail, carbon trekking pole maintenance becomes a daily ritual rather than an occasional chore. The goal is simple, because you want to keep trekking day after day without a preventable gear failure that forces an unplanned exit. A few disciplined habits will keep your poles working from the first pass to the final trailhead sign.
At camp each night, collapse your trekking poles, wipe them with a damp cloth, and check every lock for grit or ice before you crawl into your sleeping bag. If you have time to type up a quick gear log on your phone, note any small issues like a slipping twist lock or a noisy flip lock so you can address them during the next rest day. This habit turns vague impressions into clear maintenance tasks and helps you spot patterns before they become failures.
On rest days, take the pole sections apart completely, rinse them with warm water, and let them dry in the shade while you air out boots and other gear. Inspect the expander units, the inside of the pole shafts, and the area around each locking mechanism for cracks, corrosion, or crushed fibres, then reassemble everything with locks set just tight enough to hold your weight. If you are carrying ultralight carbon fibre models like the Gossamer Gear LT5 trekking poles, be especially strict about this inspection once you pass roughly 1 500 miles (2 400 km) of use.
Long distance hikers often obsess over packs and shelters but forget that poles are load paths too. When you start pushing into serious mileage, consider pairing durable poles with an equally robust pack such as the new ultralight models discussed in this analysis of an advanced waterproof pack material at this waterproof pack review. Matching your trekking poles and hiking poles to your pack weight and terrain will do more for your knees than shaving a few grams off your stove.
Finally, remember that trekking poles reduce knee compressive force by up to about 25 percent according to research summarized by REI Expert Advice and Banner Health, which both draw on peer reviewed biomechanics studies. That benefit only holds if your pole maintenance keeps the shafts, tips, and straps trustworthy under real trail loads. In the end, what saves your joints is not the advertised weight or waterproof rating, but the tenth river crossing when your poles still bite and your legs stay upright.
Quick field repair checklist
• Tighten flip lock screws with a small multi tool or coin
• Roughen a slipping twist lock expander with fine sandpaper or a nail file
• Replace a broken strap with cord or spare webbing looped through the handle
• Tape over small shaft cracks and downgrade the pole to low consequence terrain only
FAQ
How often should I replace the tips on carbon trekking poles ?
Most hikers should replace carbide tips on carbon trekking poles every 300 to 500 trail kilometres (190–310 miles), depending on how much rock and hardpack they encounter. When the tip looks rounded rather than pointed or starts slipping more on stone, it is time for new tips. Replacing them early protects the pole shafts and maintains reliable grip on technical terrain.
Can I use carbon trekking poles in winter conditions ?
You can use carbon trekking poles in light winter conditions, but they are more vulnerable to cold embrittlement below roughly minus 7 °C (about 20 °F). In sustained deep cold, carbon fibre can develop micro cracks that lead to sudden shaft failure under side loads. For serious winter mountaineering or heavy packs, aluminum poles are usually the safer choice.
What is the best way to clean carbon trekking poles after a muddy hike ?
After a muddy trek, take the pole sections apart and rinse them with warm water to remove grit from the shafts and locks. Use mild soapy water and a soft cloth on the exterior, then dry everything thoroughly in the shade before reassembling. Avoid harsh chemicals and never store the poles wet, because trapped moisture can damage both carbon and metal parts over time.
How tight should I set twist locks and flip locks on my poles ?
Twist locks and flip locks should be tight enough that the pole does not slip when you load it with your full body weight, but no tighter. Over tightening twist locks can crush thin carbon shafts, while over clamping flip locks can leave permanent marks and weaken the tube. A good rule is to tighten gradually, test under load, then stop as soon as the pole holds securely.
When should I switch from carbon trekking poles to aluminum models ?
Switch from carbon trekking poles to aluminum when you expect sustained sub freezing temperatures, heavy packs above about 16 kilograms, or frequent off trail scrambling on sharp rock. Aluminum poles usually bend rather than snap, which gives you more warning before total failure. Many experienced mountaineers carry carbon for three season hiking and trekking, then swap to aluminum for winter and high consequence routes.