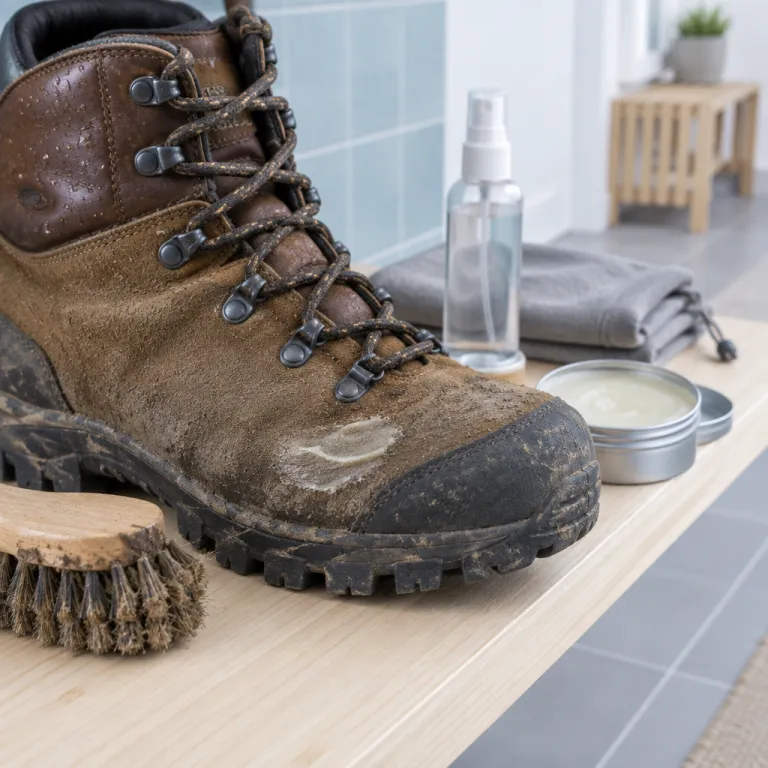
Why end-of-season boot cleaning decides next year’s miles
Most hikers think about how to clean hiking boots only when they smell bad. By then, dried mud, road salt, and trail grit have already chewed into the leather and stitching of your favourite hiking footwear, quietly shortening their working life. A single lazy day at the end of the season can undo a full year of careful gear choices.
When mud dries on boots, the fine mineral particles act like sandpaper against seams. Mix that with salt from sweat or winter roads and you get a corrosive paste that stiffens leather, cracks waterproof membranes, and makes even premium boots waterproof for fewer seasons than advertised. If you want your hiking boots to stay supportive and truly waterproof hiking companions, you need a repeatable cleaning and drying routine, not a once in a decade scrub.
Think about what your boot uppers actually see on trail. Caked mud from clay switchbacks, alkaline dust from desert tracks, and organic muck from boggy forest sections all cling to the boot and hold water against the material for hours. That trapped water keeps the leather swollen, weakens adhesives, and slows drying so much that mould can start between the lining and midsole before you even air dry the pair in your hallway.
There is also a biosecurity angle that experienced hikers sometimes overlook. When you fail to remove dirt and rinse boots after a trip, you risk transporting seeds, spores, and tiny organisms between regions, which contributes to the spread of invasive species along popular routes. A careful cleaning habit respects both your investment in high quality hiking footwear and the fragile ecosystems that make each trail worth hiking in the first place.
The five-minute post-hike habit that saves your boots
End-of-season care starts with what you do every hiking day you come home tired. Before you even read your trip notes or upload photos, knock the boot soles together outside to remove loose dirt and caked mud from the lugs. This simple ritual keeps the outsole from hardening into a rock like layer that traps water and slows later cleaning.
Next, undo each lace fully so the tongue can open wide and the boot can breathe. Pull the insoles out and let them air dry separately, which prevents odour and helps the midsole foam rebound between trips. If you are wearing a technical shell such as the promotional men’s Egmont packable jacket on wet days, hang it to dry in the same cool, shaded space where your dry boots will rest overnight.
Now move to actual cleaning while the mud is still soft. Use a soft brush or an old toothbrush to clean the upper, paying attention to stitching lines, lace eyelets, and the junction where the rand meets the leather or fabric. A quick rinse with lukewarm water is enough for most hiking boots, and you should always rinse boots gently rather than blasting them with high pressure water that can drive grit into the seams.
For waterproof hiking models such as the Salewa Mountain Trainer Mid Gore Tex men’s shoes in asphalt and fluo orange, this early brushing and rinsing keeps the outer fabric from loading up with grime. When the face fabric stays clean, the durable water repellent coating can bead water properly, which helps the membrane inside stay breathable and keeps the boot feeling dry on long trail days. Five minutes of attention after each hike means your end-of-season cleaning becomes a light refresh, not a rescue mission.
Deep cleaning: water, brushes, and what not to use
Once the season winds down, plan one focused session to clean your hiking boots thoroughly. Start by removing the laces and footbeds so you can reach every seam and inspect the full interior for wear, grit, or trapped mud. This is the moment to read the care label and any brand guidance about cleaning products and drying limits.
Fill a basin with lukewarm water and add a small amount of boot specific cleaner or very mild soap. Dip a soft brush, then clean the upper in sections, working from the collar down to the rand and finally the outsole, always rinsing the brush so you do not grind dirt back into the leather. For stubborn caked mud on the sole, use a stiffer brush or a plastic scraper, but never a metal tool that can gouge rubber or cut stitching.
For full grain leather boots, keep the water contact brief and controlled. Leather absorbs water, and if you soak the boot completely you risk stretching panels and weakening adhesives that hold the midsole and outsole together. Instead, clean, then quickly rinse boots with fresh water, wipe away excess moisture with a cloth, and let them start drying in a well ventilated room.
Fabric and mesh hiking footwear, including waterproof hiking models like the Salewa Mountain Trainer Mid Gore Tex men’s shoes in dark denim and black, tolerate water better but still hate heat. Never use direct heat sources such as radiators, campfires, or hair dryers for drying, because they can warp midsoles and cause the boots waterproof membrane to delaminate. Let every boot air dry slowly at room temperature, with newspaper stuffed lightly inside to pull moisture from the lining without deforming the shape.
Re-waterproofing, PFAS-free trade-offs, and reading wear
Once your boots are fully dry, evaluate how well they still shed water. Sprinkle a little clean water on the upper and read the behaviour of the droplets, watching whether they bead and roll off or soak in and darken the leather or fabric. If the water soaks quickly, it is time to refresh the waterproof treatment before your next long trail outing.
Match the product to the material of your hiking footwear. Full grain leather boots respond best to wax or cream based treatments that nourish the leather and restore both flexibility and water resistance, while nubuck and fabric uppers usually need a spray on durable water repellent that preserves their textured surface. Many modern sprays are PFAS free, which is better for the environment but tends to wear off faster, so expect to reapply more often if you want your boots waterproof performance to stay consistent.
Apply treatments sparingly and evenly, always on clean, dry boots. Work wax into leather with a soft cloth, paying attention to flex points over the toes and around the ankle where cracks start, and let the boot rest so the product can penetrate before you buff away any excess. For spray products, follow the label, maintain the recommended distance, and allow full drying time before you store the pair or pack them for a multi day hiking trip.
This is also the time to read wear patterns that cleaning reveals. Check the outsole lugs for rounding or shallow depth, look for early delamination at the toe, and inspect stitching where the upper meets the midsole, because these details tell you whether a resole is realistic or the boot is nearing retirement. When the structure is sound, good cleaning and re-waterproofing can easily buy another 300 kilometres, but when the platform is tired, no amount of wax will save a boot that has already lost its support.
Drying done right and off-season storage that adds seasons
Proper drying is where many otherwise careful hikers quietly ruin their boots. After cleaning, always let boots air dry at room temperature, away from direct sun, radiators, or wood stoves that can overheat leather and midsole foam. Stuffing the boot with newspaper or using a purpose built boot dryer on a low setting speeds drying without cooking the materials.
Rotate the paper as it becomes damp so moisture keeps moving out of the lining. Leave the laces loose and the tongue fully open so air can circulate, and keep the footbeds out until everything feels completely dry to the touch, not just on the surface. Rushing this step traps water deep in the boot, which encourages mould, weakens adhesives, and makes your supposedly dry boots feel clammy on the first day back on trail.
For long term storage, think like a gear librarian, not a tired hiker dumping a pack. Store hiking boots in a cool, dry closet, never in a hot garage, damp basement, or sealed plastic bin where humidity can build up around the footwear. Loosen each lace, keep the shafts upright, and avoid stacking heavy gear on top so the boot retains its shape and the leather does not crease into hard ridges.
Before you put them away for the off season, give the uppers a final wipe to remove any last traces of dirt and check that no mud remains hidden under the insole or inside the gusseted tongue. A light conditioning of full grain leather before storage keeps it supple, while a quick read waterproof test with a few drops of water tells you whether to plan a treatment session before your first big hike next season. In the end, the real measure of care is not the marketing promise on the hangtag but how your boots feel on the tenth river crossing of a long day, when quiet, well maintained support matters more than any spec sheet.
FAQ
How often should I clean my hiking boots during the season ?
Rinse boots lightly and brush off dirt after every muddy hike, then do a more thorough cleaning with lukewarm water and mild cleaner every few weeks if you hike often. This habit keeps mud and grit from building into a hard layer that damages leather and stitching over time. Regular light care makes the end-of-season deep clean much faster and more effective.
Can I put my hiking footwear in a washing machine ?
Do not machine wash hiking boots, whether they are leather or synthetic. The combination of soaking, detergent, and spinning can deform the boot, weaken adhesives, and compromise the waterproof membrane. Hand cleaning with brushes, controlled water, and careful drying is safer and preserves performance.
How do I know when to reapply waterproof treatment ?
After cleaning and drying, drip a little clean water on the upper and watch what happens. If the droplets bead and roll off, your treatment is still working, but if the water soaks in quickly and darkens the material, you should reapply wax or spray. Most hikers find that high use boots need re-waterproofing at least once per season, especially with modern PFAS free products.
Is it safe to dry boots near a heater or campfire ?
Avoid direct heat from radiators, stoves, or campfires, because high temperatures can crack leather, warp midsoles, and damage waterproof membranes. Instead, air dry boots at room temperature with good ventilation, using newspaper or a low setting boot dryer to pull moisture from the inside. This slower approach protects both comfort and long term durability.
When should I replace rather than repair my hiking boots ?
Inspect the outsole lugs, midsole cushioning, and upper structure after cleaning. If lugs are worn nearly flat, the midsole feels packed out and unsupportive, or the upper shows deep cracks and delamination, replacement is usually wiser than repair. A cobbler can sometimes resole a high quality boot, but only when the upper and midsole are still structurally sound.