Why your first ultralight backpack guide should start with you, not the brand
Your first ultralight backpack guide should not begin with Hyperlite versus Gossamer Gear. It should begin with a hard look at your backpacking style, the terrain you hike, and the real pack weight you can carry for ten hours without hating life. When hikers obsess over brands and ignore fit, volume, and suspension, the most expensive ultralight backpack quickly feels like the worst backpacking gear they ever bought.
Think of the pack as the chassis that makes every other ultralight gear choice either shine or fail. A brilliant sleep system with a premium sleeping bag and a thick sleeping pad still feels miserable if the hip belt slides off your iliac crest and dumps weight onto your shoulders. The best lightweight tent and the lightest camp shoes will not save a backpacking trip if your base weight is miscalculated and your ultralight backpacks are overloaded from day one.
Brand names matter less than matching volume, suspension, and hip belt geometry to your body. Hyperlite, Gossamer Gear, ULA, Zpacks, and Outdoor Vitals all build excellent ultralight backpacking tools, but none of them can fix a poor fit. A smart first ultralight backpack guide keeps you focused on how the pack carries 12 to 18 kilograms, how the frame transfers load to the hips, and how the shoulder straps and trekking pole attachments interact with your stride on real trail surfaces.
Start by writing down the items that must live inside your pack on a three day backpacking trip. Include your backpacking tent or tarp, sleeping bag or quilt, sleeping pad, cook kit, clothing, first aid kit, and food plus water for the longest dry stretch you expect. This gear list becomes the backbone of your base weight calculation and the reference for choosing a pack volume that is neither comically huge nor frustratingly small.
Then look at your current pack weight on a real scale, not a guess. Many hikers who think they are already ultralight are still carrying 14 kilograms once they add full water bottles, dense food, and a few luxury items like camp shoes or a heavy therm rest style inflatable pad. Your first ultralight backpack guide should help you trim obvious excess while accepting that some weight, like robust first aid supplies or a warmer base layer, is non negotiable in the mountains.
Volume, base weight, and the load ceiling that really matters
Volume is where most first time buyers go wrong in their first ultralight backpack guide. They pick a number from a forum, buy a 40 litre ultralight backpack, and then wonder why their sea summit dry bags and bulky sleeping bag will not fit without strapping half their gear outside. The smarter path is to start from your quilt or sleeping bag, your shelter, and your maximum food carry, then add roughly ten percent volume as a buffer.
Lay out your full sleep system, including sleeping pad, base layer, and any extra clothing you only use at night. Add your backpacking tent or other tents, your cooking items, your first aid kit, and the food and water you need for the longest leg of your planned backpacking trip. Pack everything into a temporary bag or cardboard box, measure the volume if possible, and let that real world number guide your choice between a 40, 50, or 60 litre ultralight backpacks category.
Once you know the volume, match it to a realistic load ceiling. Frameless packs feel great when your base weight is under 5 kilograms and your total pack weight stays below 11 to 12 kilograms, but they collapse into a sagging tube when you push beyond that. A framed ultralight backpack with a stiff hip belt and functional load lifters will carry 14 to 18 kilograms with far more control, especially when you add dense water weight for dry stretches between sources.
Think of load ceilings in clear bands rather than vague marketing claims. Frameless packs are comfortable for most hikers up to about 9 to 11 kilograms, minimal frames up to 13 to 15 kilograms, and robust but still lightweight frames up to roughly 18 kilograms before comfort drops sharply. If your first ultralight backpack guide shows that your typical backpacking gear and food carry will often push 15 kilograms, you should be looking at framed packs like the Gossamer Gear Mirage 40, the Hyperlite Unbound 55, or the ULA Circuit rather than chasing the lightest possible option.
Food and water planning also shape volume and weight more than beginners expect. A long alpine section with no resupply can add several kilograms of food and multiple litres of water, which quickly eats into your margin even with the best lightweight items elsewhere. Use dedicated planning resources for vegan backpacking food on the trail, such as the guidance on smart choices for vegan backpacking food, to keep calorie density high and packaging bulk low.
Frame versus frameless: comfort ceilings and beginner traps
Frameless packs are the siren song of every first ultralight backpack guide. The marketing promises freedom, simplicity, and a pack that weighs less than your insulated sleeping pad, but the physics of load transfer do not care about slogans. Once your pack weight creeps above 11 or 12 kilograms, a frameless backpack starts to fold, barrel, and hammer your shoulders with every step.
A framed ultralight backpack uses stays, a framesheet, or a carbon structure to move weight from your shoulders to your hips. That structure, combined with a well designed hip belt, lets you carry more water, more food, and a slightly heavier but more protective backpacking tent without feeling like you are hauling a duffel bag. The tradeoff is a few hundred grams of extra weight, which most hikers earn back in comfort and control on rough trail.
For most beginners, a framed pack is the safer and more forgiving choice. If your base weight is still above 5 kilograms and you are not yet ruthless about trimming redundant items, a frameless design will punish every mistake. A good first ultralight backpack guide should say this plainly, because regret at kilometre sixteen with sore shoulders and a collapsing pack is far more common than the marketing suggests.
Use your sleeping pad as part of the frame only if you understand the limitations. Rolling a therm rest style pad into a tube or folding a foam pad as a virtual frame can stiffen a frameless pack, but it rarely matches the stability of a true internal frame when you add dense water bottles and a full food bag. If you insist on frameless, keep your total pack weight under 11 kilograms and your base weight under 5 kilograms, and accept that your choice of ultralight gear must be disciplined.
Water resistance strategy also interacts with frame choice. Many framed ultralight backpacks use durable but not fully waterproof fabrics, so you rely on a pack liner, sea summit style dry bags, and sometimes a rain cover to keep your sleeping bag and spare base layer dry. Frameless Dyneema packs may be more water resistant, but most experienced hikers still run two layers of protection, because the only thing worse than wet feet in camp shoes is a soaked sleep system after a day of cold rain.
When you plan food and snacks for these loads, look at resources on perfect backpacking snacks that balance calories and weight. Guides such as the article on elevating your trail experience with perfect backpacking snacks can help you keep energy high without adding unnecessary bulk that strains a frameless design. The right snacks, combined with realistic pack weight limits, will keep your energy steadier than any ultralight marketing promise.
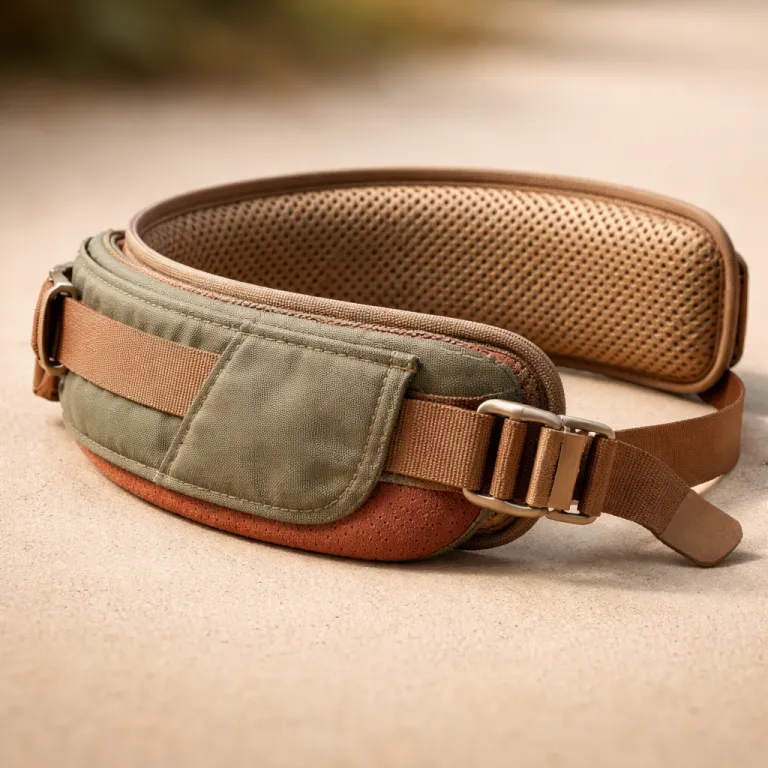
Hip belt fit, torso length, and the features that actually matter
Hip belt fit is where comfort is won or lost in any first ultralight backpack guide. The belt must wrap the iliac crest, which is the bony shelf at the top of your pelvis, and it must do so without gapping, pinching, or riding up when you walk. If the hip belt floats above that crest, your shoulders carry the load and every extra kilogram of water or food feels like a punishment.
Measure your torso length from the C7 vertebra at the base of your neck down to the midpoint between your iliac crests. Then compare that number to the manufacturer’s sizing chart, paying close attention to packs with adjustable torso length, because that adjustability can rescue a borderline fit. Women specific hip belts often curve differently and use narrower angles, which can dramatically improve comfort for many female hikers whose anatomy does not match unisex designs.
Load lifters are another underrated feature that your first ultralight backpack guide should highlight. These small straps run from the top of the shoulder straps to the upper frame and allow you to fine tune how close the pack rides to your back. Without them, a heavy food bag or a full water carry can pull the pack backward, forcing your lower back to fight the leverage all day.
Beginners often overvalue stretchy mesh rear pockets and hip belt pockets because they look convenient in photos. Those pockets are useful for quick access to a rain jacket, snacks, or a compact first aid kit, but they do not fix a poor frame or a badly sized torso length. The features that truly matter are a supportive hip belt, functional load lifters, stable trekking pole carry options, and a frame that matches your expected pack weight range.
Think carefully about how you will use trekking poles with your chosen pack. Some hikers like to stow a single trekking pole quickly for scrambling, while others carry both poles on the pack during steep snow or when using a backpacking tent that does not rely on poles. Your first ultralight backpack guide should push you to test how easily you can attach and remove poles without taking the pack off, because that small detail shapes how often you actually use them on trail.
Clothing systems also interact with pack design more than most buyers realise. A well chosen base layer, a weatherproof shell, and even an anorak style jacket that layers cleanly under the shoulder straps can reduce chafing and hot spots, as explained in depth in this analysis of how anorak jacket styles elevate performance for serious hikers. When your clothing, pack, and hip belt all work together, you move more efficiently and keep your overall base weight lower because you are not compensating for discomfort with extra items.
Water protection, packing strategy, and why used ultralight packs are risky
Keeping critical gear dry is a non negotiable part of any first ultralight backpack guide. Your sleeping bag, spare base layer, and essential first aid items must stay dry even when the trail turns into a river and the wind drives rain sideways. Most experienced hikers use a belt and suspenders approach, combining a pack liner with individual dry bags for the most sensitive gear.
Think in layers of defence rather than trusting a single fabric or coating. A lightweight pack liner protects the entire interior, while sea summit style dry bags keep your sleeping bag, sleep system components, and spare clothing safe from leaks or accidental spills. Some hikers still add a rain cover for heavy storms, but many ultralight backpacks skip this in favour of better fabrics and smarter internal organisation.
Packing strategy also shapes how the pack carries and how quickly you can respond to changing conditions. Place dense items like food and water close to your spine and between your shoulders and hips, then surround them with softer gear such as your sleeping pad or extra clothing to prevent hard edges from digging into your back. Keep frequently used items like a compact first aid kit, snacks, and a light insulating layer near the top or in side pockets so you are not unpacking your entire bag on a windy ridge.
Camp shoes, extra base layers, and luxury items should be deliberate choices, not afterthoughts. Every extra kilogram you add to your base weight raises your total pack weight and pushes you closer to the comfort ceiling of your chosen frame or frameless design. A disciplined first ultralight backpack guide will ask you to justify each item in terms of safety, comfort, or recovery, and to leave behind anything that does not clearly earn its place.
Buying a used ultralight backpack sight unseen is tempting, but it is rarely wise. You cannot easily assess whether the hip belt foam is crushed, the frame has been bent, or the fabric has been weakened by UV exposure and overstuffing. For a piece of gear that must carry 10 to 18 kilograms comfortably for years, the risk of hidden damage and a poor fit outweighs the savings, especially when your entire trip depends on that pack performing flawlessly.
Boots, packs, and clothing all share the same hard lesson from long trails. What matters in the end is not the marketing copy or the claimed waterproof rating, but how the gear behaves on the tenth river crossing, the fifth storm, and the final climb when you are tired and hungry. Choose your first ultralight backpack with that reality in mind, and every kilometre on the trail will feel more like freedom than penance.
FAQ
How heavy should my first ultralight backpack be?
For most hikers, a first ultralight backpack in the 800 to 1200 gram range offers the best balance between durability, comfort, and low weight. If your total pack weight will often exceed 12 kilograms, prioritise a supportive frame and hip belt over shaving the last 200 grams. A slightly heavier but more stable pack usually feels lighter on your back over long days.
Is a frameless pack a bad idea for beginners?
Frameless packs are not inherently bad, but they are unforgiving. They work best when your base weight is under 5 kilograms and your total pack weight rarely exceeds 11 kilograms. Most beginners are above those numbers, so a framed pack is usually the more comfortable and versatile choice.
What volume should I choose for a week long trip?
Many experienced hikers find that 45 to 55 litres is ideal for a week long backpacking trip with modern lightweight gear. If your sleep system and backpacking tent are very compact, you might manage with 40 litres, while bulkier gear may push you toward 60 litres. Always size volume from your actual packed gear plus food and water, then add a small buffer.
How important is hip belt fit compared with shoulder straps?
Hip belt fit is usually more important than shoulder strap comfort for loads above 10 kilograms. A well fitted hip belt should carry most of the weight on your pelvis, allowing your shoulders to stabilise rather than support the load. Poor hip belt fit quickly leads to sore shoulders, lower back fatigue, and a pack that feels heavier than it really is.
Do I need special dry bags if my pack fabric is waterproof?
Even with waterproof fabrics, seams, zippers, and abrasion can allow water to reach your gear. Using a pack liner plus a few lightweight dry bags for your sleeping bag, spare clothing, and first aid kit adds crucial redundancy. This layered approach keeps critical gear dry when storms, river crossings, or accidental punctures defeat a single line of defence.